Visualisatie: afbeeldingen, scènes en video's maken
Wat Visualisatie doet
Visualisatie (Visualization) in de linkerzijbalk heeft drie tabbladen. Scènemaker (Scene Creator) bouwt geanimeerde scènes die je kunt omzetten in video's of GIF's. Video-editor (Video Editor) voegt videoclips samen op een tijdlijn. Afbeeldingseditor (Image Editor) maakt AI-afbeeldingen, logo's en drukklare afbeeldingen. Wat je opslaat, wordt bewaard bij de marketingrelatie waarin je werkt, en verschijnt dus ook in Bestanden.
Voordat je begint
- Selecteer een marketingrelatie in Huidig account (Current Account) in de zijbalk. Daar staan de relaties waarbij Marketingrelatie (Marketing Relation) is aangevinkt (dat stelt een bedrijfsbeheerder in).
- Gebruik een desktopbrowser. Dit zijn grote editors waarin je veel sleept, en de mobiele app markeert ze met Desktop aanbevolen.
- AI-generatie kan als gebruik worden gefactureerd. Bedrijfsbeheerders zien een cijfer voor AI-gebruik bij Instellingen -> Account -> Plan & Gebruik (Plan & Usage) (de regel AI-tool voor het genereren van tekst). Wat je kunt gebruiken, kan afhangen van je abonnement; zie Prijzen.
- Deze pagina gebruikt de labels van de Nederlandse app. De Nederlandse, Duitse en Franse app tonen deze schermen en vensters in die taal.
Waarschuwing: Zonder geselecteerde relatie toont Visualisatie een lege pagina, zonder melding.
Afbeeldingseditor
Startscherm
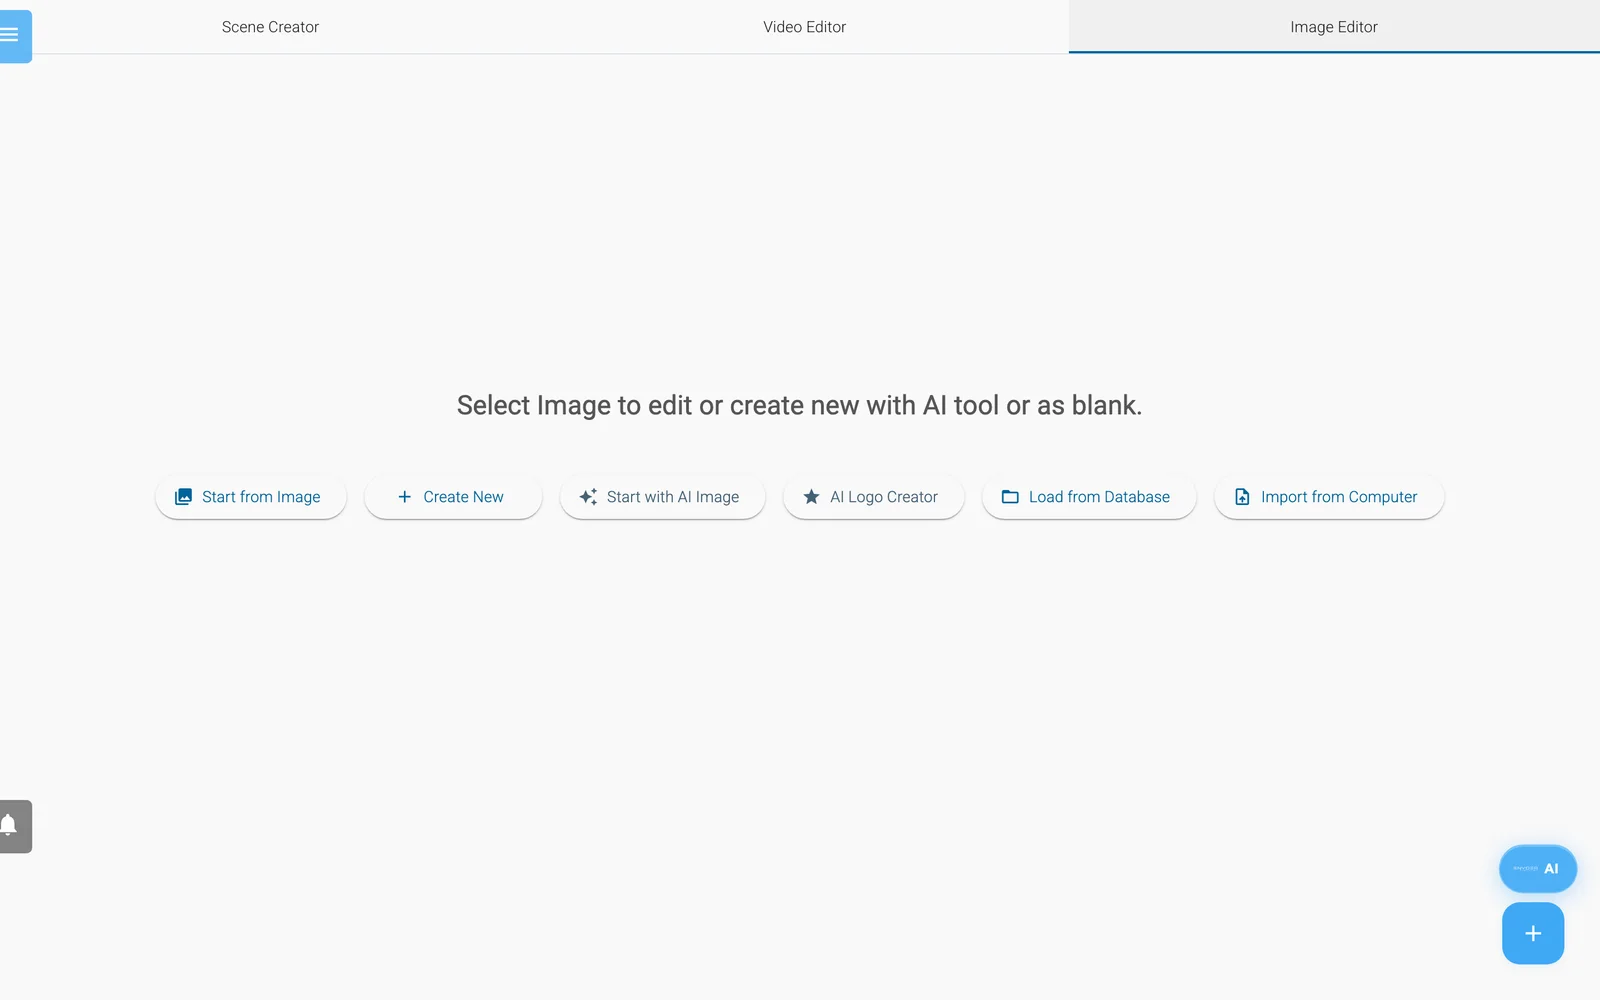
Het startscherm van de Afbeeldingseditor.
- Beginnen met AI-afbeelding opent de AI-afbeeldingstool (zie hieronder). AI-logomaker maakt een logo met AI.
- Vanaf afbeelding beginnen gebruikt een afbeelding uit de galerij als canvas. Nieuw maken opent een leeg canvas.
- Laden vanuit database opent een opgeslagen project opnieuw. Importeren van computer laadt een project-JSON-bestand.
Canvastools
De speed-dial-knop voegt afbeeldingen, tekst, vormen, grafieken en vectoren toe (Vectorafbeelding toevoegen, Vector tekenen), en start Beeld verbeteren (SDXL), Inpaint/objecten verwijderen (Inpaint/Remove Objects), AI-logomaker, AI-afbeelding genereren en AI-SVG-generator. De werkbalk heeft Canvas-instellingen (naam, formaat, achtergrond), AI-tools, Bijsnijden en transformeren en zoomen.
De AI-afbeeldingstool
Open AI-afbeeldingstool met Beginnen met AI-afbeelding, AI-afbeelding genereren of AI-tools -> Nieuwe afbeelding genereren.
- Beschrijf de afbeelding in het omschrijvingsveld (maximaal 400 tekens). Beschrijving verbeteren met AI herschrijft de omschrijving.
- Optioneel: open Slimme voorinstelling, typ een doel, kies Voorstellen en daarna Voorinstelling toepassen. Voorinstellingen bekijken toont presets waaruit je zelf kiest.
- Stel in Basisinstellingen de Afbeeldingsformaat, Hoeveel versies? (1 tot 4), Hoofdkleur en Compositiekwaliteit (Standaard, Verbeterd (aanbevolen), Strikt) in. Verdere panelen: Artistieke stijl, Scène en omgeving, Camera en compositie, SDXL-instellingen en -functies (LoRA-stijl, Multi-LoRA-menging).
- Kies Afbeelding maken. Het venster toont Je afbeelding wordt gegenereerd... en een knop Annuleren.
- Kies een afbeelding en daarna Selecteren, Opslaan, Verbeteren, Variatie of Opnieuw proberen.
Selecteren vraagt om een Importmodus: Ja vervangt de achtergrond van het canvas, Nee voegt een nieuw element toe. De afbeelding wordt ook in de bestanden van de relatie bewaard, dus je hoeft niet eerst Opslaan te kiezen. Verbeteren vraagt om een Verbeteringsmethode (Verfijnen, Restylen, Stijloverdracht, Opmaak + stijl, Gezicht, Onderwerp, Outpaint, Tekst vervangen) en een Verbeteringsprompt, die je moet invullen.
Let op: Afbeeldingsformaat werkt alleen als er een slimme voorinstelling is toegepast.
Opslaan en exporteren
| Knop | Wat hij doet |
|---|---|
| Omzetten naar afbeelding | Vraagt om een naam, toont een voorbeeld, slaat een PNG op in de bestanden van de relatie en downloadt hem. |
| Transparante PNG | Hetzelfde, zonder de achtergrond. |
| Opslaan om af te drukken | Formaatpreset, DPI, oriëntatie, marge en optioneel opschalen met AI, daarna Opslaan als PDF of Afdrukken. |
| Upscalen + PDF | Upscale-instellingen (2x of 4x; AI (SD) of Snel (Lanczos)), downloadt daarna een PDF. Werkt alleen met een afbeelding op het canvas. |
| Project opslaan, Project openen | Houdt het project bewerkbaar. Het kopieerpictogram slaat het op onder een nieuwe naam. |
Namen mogen alleen letters, cijfers, koppeltekens en underscores bevatten.
Scènemaker
Een scène bouwen
- Algemene instellingen (General Settings): naam, Duur in seconden, formaat. Instellingen achtergrond/audio: achtergrondafbeelding, video, audio, kleur, effecten.
- Voeg elementen toe met Menu Elementen openen of de speed-dial-knop: teller, afbeelding, tekst, vorm, geanimeerde afbeelding, tekening, grafiek, door AI gegenereerde inhoud, formulier, personage, 3D-model, ingesloten video.
- Selecteer een element, klik op Animatiemenu openen en voeg een animatie toe: Type animatie, Easing-type (Ease type), Duur, Start, herhalen. AI-animatie bouwt er een uit een omschrijving.
- De ronde knop Renderen bij de afspeelknoppen ververst alleen het voorbeeld in je browser. Hij maakt geen video; dat doet Converteren naar video.
AI-vensters
| Knop | Wat hij doet |
|---|---|
| AI videocreator (AI Video Creator) | Tekst naar video en Afbeelding naar video: beschrijf de clip, kies eventueel Voorbeeld genereren en daarna Volledige video genereren. In Taken bewaart Downloaden en opslaan hem in je bestanden; daarna Instellen als achtergrond of Aan canvas toevoegen. |
| AI-videopipeline | Maakt van een briefing een video met meerdere scènes. Zie Maak een korte productvideo en deel hem. |
| TTS generator | Tekst naar spraak. Stemmen: XTTS (meertalig) of LJSpeech (alleen Engels). Gebruiken als canvasaudio of Gebruiken als achtergrondaudio. |
| Wav2Lip generator | Synchroniseert de lippen in een video of afbeelding met audio of getypte tekst. |
| Stem klonen (Voice Cloning) | Heeft 6-10 seconden duidelijke audio van één spreker nodig. Gebruik alleen stemmen die je mag gebruiken. |
| AI-SVG-generator | Tekst naar SVG, Afbeelding naar SVG, Iconen zoeken; daarna Importeren naar canvas, Opslaan in Bestanden of Downloaden. |
| 3D-modelgenerator | Bouwt een 3D-model uit één of meer afbeeldingen; Aan scène toevoegen. |
Opslaan, omzetten en delen
Het menu met de drie puntjes in de werkbalk verschijnt zodra er een relatie is geselecteerd.
- Opslaan, Opslaan als, Nieuw, Laden vanuit database, Downloaden als JSON-bestand, Importeren van computer.
- Converteren naar video vraagt om een bevestiging en een naam, slaat de scène op en maakt een MP4. De app meldt dat dit even kan duren, dat je kunt doorwerken en dat je een melding krijgt. Je vindt het bestand in Bestanden. De voltooide video wordt ook als clip toegevoegd in het tabblad Video-editor; Scène aan video toevoegen doet hetzelfde.
- Omzetten naar GIF en Omzetten naar kleine GIF zijn uitgeschakeld voor scènes die langer zijn dan 61 seconden.
- PNG-afbeelding maken, JPEG-afbeelding maken, Transparante PNG maken, Opslaan om af te drukken (PDF) en Upscalen + opslaan als PDF exporteren stilstaande beelden.
- PowerPoint importeren zet een .pptx-bestand om in scènes. PowerPoint verbeteren verbetert ontwerp en animatie en downloadt een kopie. Exporteren naar PowerPoint exporteert de huidige scène.
- Deellink kopiëren kopieert een openbare link (sla de scène eerst op). De pagina speelt de video af als het opgeslagen record er een heeft, toont anders een stilstaand voorbeeld, en meldt anders dat de presentatie nog niet als video is gerenderd.
Video-editor
- Kies op een clip Video laden om een video te kiezen of te uploaden. Kies Clip toevoegen voor meer clips.
- Weergavemodus schakelen wisselt tussen raster en tijdlijn. Sleep clips, of gebruik Naar links en Naar rechts, om de volgorde te veranderen.
- Stel in de clipeigenschappen Overgangseffect, Overgangsduur, Fade-offset, Begin inkorten en Einde bijsnijden in, of gebruik Clip splitsen (Split Clip), Dupliceren (Duplicate) en Clip verwijderen.
- Voeg muziek toe met Audio laden; Audio verwijderen haalt die weer weg.
- Het menu met de drie puntjes bevat Project openen, Opslaan, Opslaan als... en Video exporteren.
Let op: Heeft Projectnaam al een naam, dan slaat Video exporteren het project op in plaats van het te exporteren. Laat Projectnaam leeg om te exporteren; de app vraagt dan om een naam en start de export.