
Mailing lists and segments: build your audience
What mailing lists are
A mailing list is the set of recipients a campaign sends to. Each entry has an email address and optional title, first name, last name, company, website and four free Info fields for personalisation. Lists live on the Mailing list tab of Mailings. You can fill a list by hand, from a file, from your CRM, or let a dynamic list follow a live CRM segment.
Before you start
- Mailings works on the relation shown in Current Account. New accounts start with one.
- Lists built from your CRM need relations or contact persons with email addresses. See Relations and CRM.
Create a list and add recipients
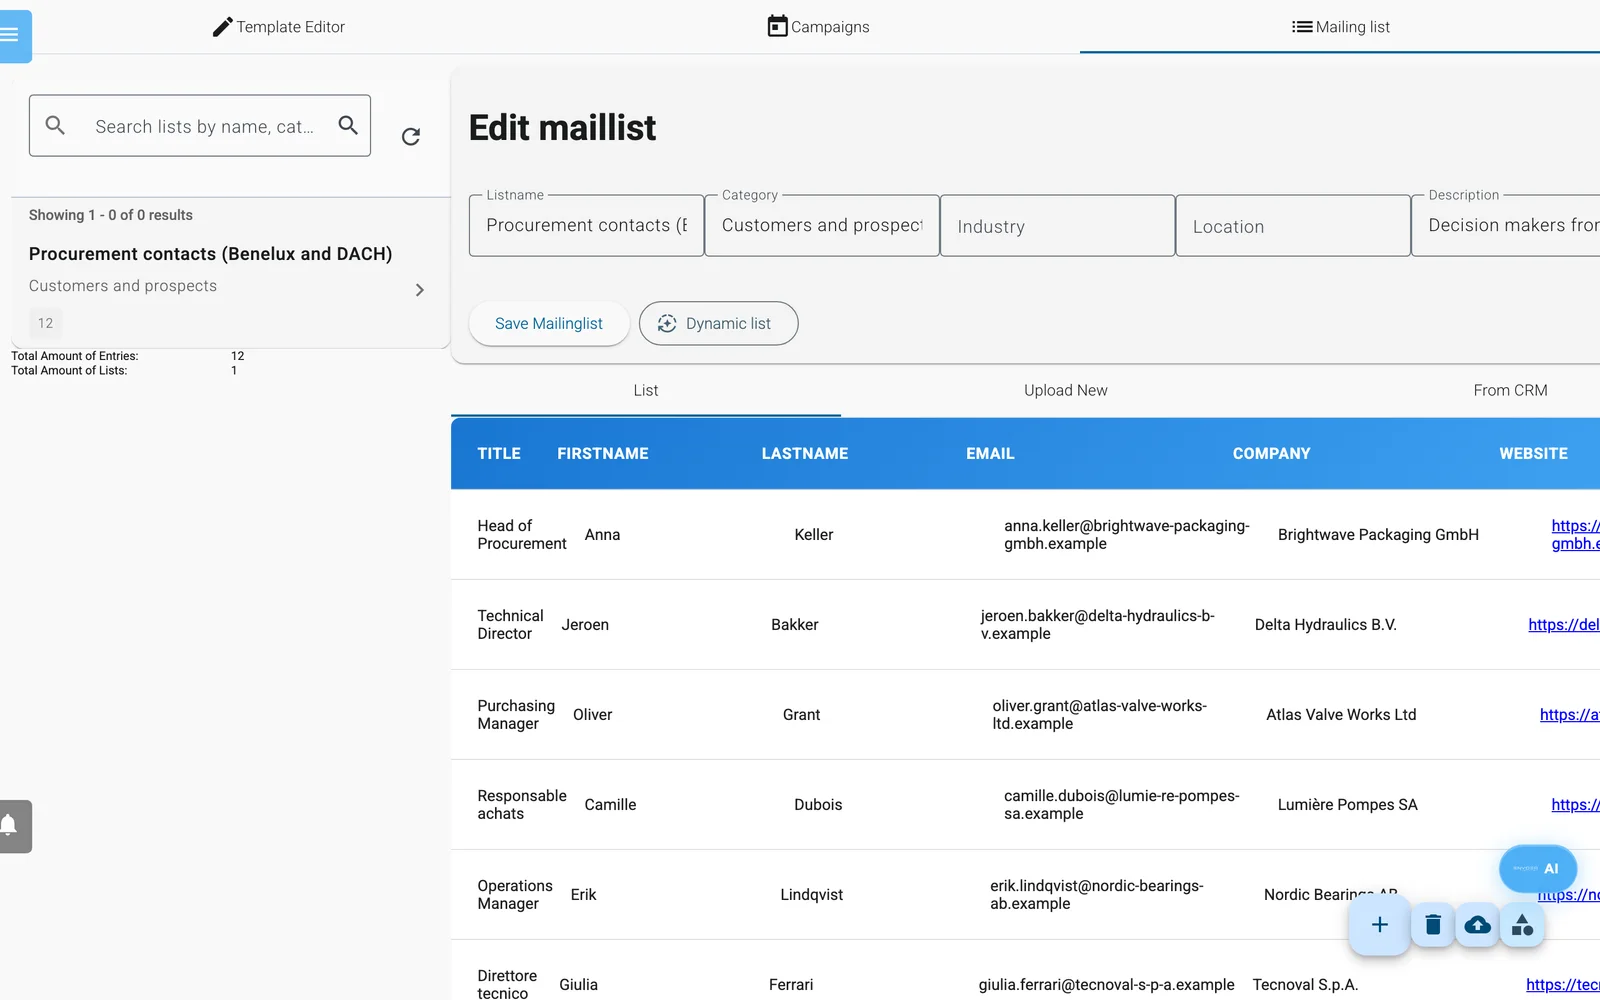
A mailing list with its recipients. The tabs above the table are List, Upload New and From CRM.
- Open Mailings -> Mailing list.
- Click +. A list called New list is created and opened.
- Fill in Listname, Category, Industry, Location and Description, then click Save Mailinglist.
- Open the Upload New tab. To add one person, fill in Email (and any other fields) and click Add Recipient.
- To upload a file, drop an XLSX, XLS or CSV file on the drop zone under Upload small file (less than 500 entries). Enydea reads the first sheet and uses its first row as headers.
- Check the column drop-downs. Enydea pre-selects columns from header names such as email, firstname, lastname, company, title and website. Email must be set. Info 1 to Info 4 take any extra columns.
- Click Upload to Mailinglist.
Invalid and duplicate addresses are skipped, but the message "N entries imported" counts every row it sent, so check the list total. To split a file into several lists, pick the column that holds the list name in Maillinglist, switch on Create new Mailinglist based on Mailinglist field and confirm "This will create N new mailing lists".
The Upload large file panel on the same tab only uploads the file as a general file. It does not add addresses to a list.
The List tab shows entries 100 per page and has a bin icon per entry. It does not show which entries are unsubscribed or bounced.
Import contacts from CRM relations
- Select a list, then open the From CRM tab.
- Set filters: Search (name, city or domain), Status, Type, Country, Industry and Tags (a relation must have every tag you pick).
- Choose Marketing relations only, Include contact persons (on by default) and Include relation email (off by default).
- Click Load Preview. The preview shows unique contacts from up to 500 matching relations. Click the x on a row to drop it.
- Click Import n to Mailinglist.
An import is a snapshot. Later CRM changes do not update the list. For a list that stays current, use a dynamic list.
Dynamic lists
- Select a list and click Dynamic list. A badge ON shows when it is active.
- Switch on Make this a dynamic (auto-updating) list.
- Under Who should receive it?, click Add filter. Choose a filter and its value. Tick Not to invert it. With two or more filters, choose whether a relation must match ALL (the default) or ANY of them. A live estimate shows "matching contacts".
- Choose the Email source: Relation emails (the default), Contact-person emails or Both. Filters pick the relations; the source picks whose addresses are used.
- Refresh automatically before each send is ticked by default. Click Sync now to refresh at once, then Save settings.
A sync adds new matches and removes dynamic entries that no longer match. Entries you added by hand, by upload or by CRM import are never removed. When the source includes contact persons, the list skips private mailboxes such as Gmail, recruitment, no-reply and department inboxes such as press@, and generic inboxes such as info@ unless the contact has a name.
| Group | Filters |
|---|---|
| Membership | All contacts with an email, Has a valid email, In category |
| CRM attributes | Status is, Type is, Source is, Industry contains, Country is, City is, Owner (account id) is, Has tag, Custom field equals, Discovered by LeadFinder |
| Flags | Is B2C, Marketing opt-in |
| Scoring | Lead score at least, Employees at least |
| Recency | Created within (days), Updated within (days), Not updated within (days) |
| Engagement | Opened email within (days), Clicked email within (days), Visited page (URL pattern), Submitted a form within (days), Has not converted, High engagement score ≥ |
Has a valid email matches the same relations as All contacts with an email: relations that have an email address on file. Neither filter checks whether the address works. See Email address verification and the send gate.
Warning: Marketing opt-in is not a consent flag. It matches relations that have Marketing Relation ticked, the box that makes a relation selectable in Current Account.
CRM categories
A CRM category is a saved segment. Click the category icon on the Mailing list tab (tooltip: Manage auto-filter CRM categories) to open CRM Categories.
- Click New category. Enter Name, Color and Description.
- Tick Auto-assign matching relations (keep membership in sync with the rules) to keep members current.
- Add Filter rules with the same filters as above.
- Click Create. For an existing category, click Save & recompute.
The list shows each category's member count. Use the refresh icon to recompute members. Use a category in a dynamic list with the In category filter.
Unsubscribed and bounced addresses
Campaign mail carries a one-click unsubscribe header, and the Footer block of the template editor adds an unsubscribe link. When someone confirms the link, their address is marked unsubscribed on every list in your company, and the link never expires. Hard bounces and spam complaints are marked bounced the same way. Marked addresses are skipped at send time and are not re-added by a dynamic list. In a hand-made list they stay listed and counted; a dynamic list removes them on its next sync. Temporary delivery failures are not marked.
You can also have the AI Assistant run a mailbox check on a list before a campaign. An address the check rejects is marked bounced on every list in the same way. See Tutorial: clean a mailing list before a campaign.
When a bounce says the mailbox does not exist, Enydea also marks the contact person in your CRM as undeliverable and learns from it about that company's other addresses. A dynamic list that uses contact-person emails leaves out contact persons marked undeliverable. Before each send, the send gate can hold back addresses of contact persons that Enydea cannot confirm; by default it only reports them. See Email address verification and the send gate.