
Tutorial: import contacts into your CRM
Goal
You will fill your CRM with companies and contact persons. Pick the option that matches where your contacts are today. Each option takes a few minutes.
What you need
- For the mailbox option, a connected mailbox. See Connect your mailbox.
- For the spreadsheet option, an Excel file (
.xlsx) with a header row. Alternatively, an AI assistant connected to Enydea. See Connect Claude or ChatGPT.
The Relations screen itself has no import button. Spreadsheet import lives in Settings.
Steps
Option A: add one by one
- Open Relations and click the round + button (Create new Relation). Confirm the question.
- Type the Name and fill in the other fields.
- Open the Contact Person tab, click + (Create contactperson) and fill in the person.
Option B: scan a business card
- Open Mailbox, click the three-dot button (More actions) and choose Scan Business Card. In Relations you find the same action in the three-dot menu of a relation.
- Drop a photo of the card in the window or click to upload it (JPG, PNG or WEBP). Click Scan.
- Check the result and click Save to CRM. Enydea creates a relation and, if the card has a person's name, a contact person. If the email address already belongs to a relation, Enydea only fills its empty fields.
- Correct anything that is wrong in Relations. Changes typed in the scan window are not what gets saved.
Option C: pick up senders from your mailbox
- Open Mailbox, click the three-dot button (More actions) and choose Extract Contacts from Emails.
- Wait for the message that the contacts were extracted.
Enydea looks at the newest 200 emails in your inbox. It skips common free email domains such as gmail.com and senders such as no-reply addresses. For every sender without a relation it creates a relation with Source set to email. The relation is named after the sender, not the company, so rename it. No contact persons are created.
Option D: save companies found by LeadFinder
- Open Leadfinder and open a search with results. See LeadFinder.
- Tick the companies you want, or tick Select All. Companies already in your CRM are marked Already in CRM (duplicate). Deselect Duplicates unticks them.
- Optionally add tags, so the new relations are easy to find later.
- Click Add selection to Relations.
Option E: let a form add people
- Open Forms and open or create your form. See Forms.
- Switch on Add submissions to CRM automatically. Every submission becomes a relation and a contact person. People are matched on email address, so nobody is added twice.
Option F: bring a spreadsheet
Use this for a list of companies you already keep in an Excel file.
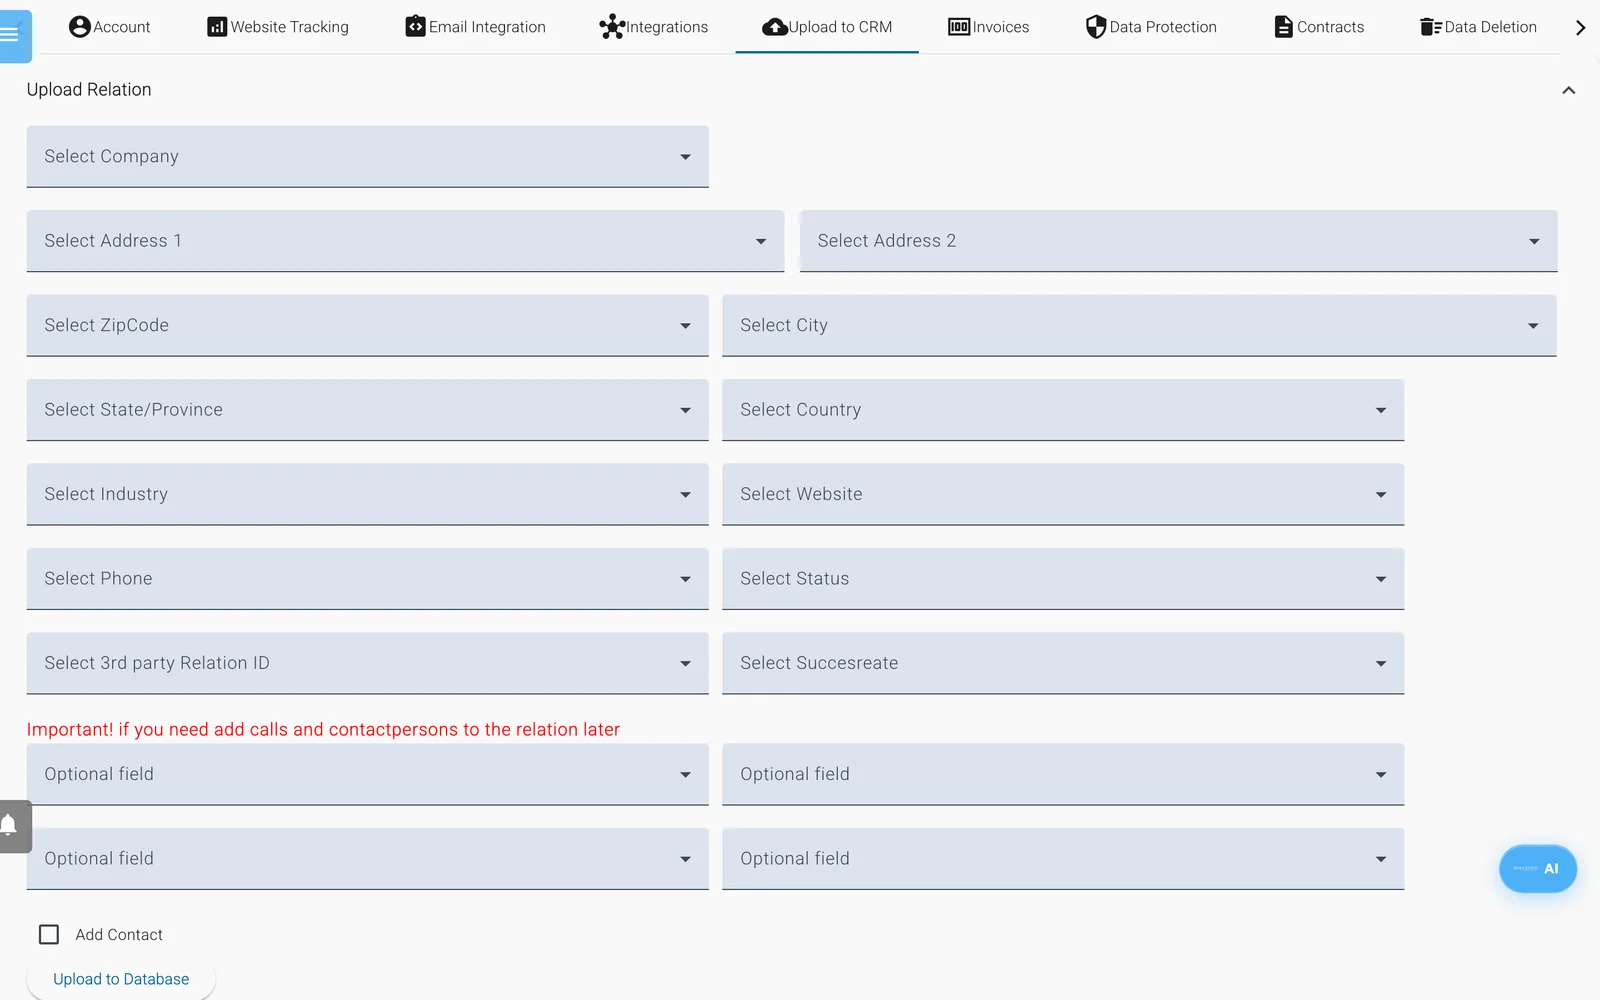
Settings, Upload to CRM, with the Upload Relation panel open. Each drop-down picks the spreadsheet column that holds that field.
- Save your list as an Excel file (
.xlsx) with a header row. Use one company per row and fewer than 500 rows. Only the company name is required. - Open Settings -> Upload to CRM and open the Upload Relation panel.
- Scroll down to Upload small file (less than 500 entries). Drag your file onto the grey area or click Choose file. The column titles from your file now fill every drop-down above.
- In each drop-down, pick the column that holds that field, for example Select Company, Select City or Select Website. Leave the fields you do not have empty.
- If the same rows also name a contact person, tick Add Contact. Drop-downs for the first name, last name, e-mail and phone appear.
- Click Upload to Database.
A summary appears at the top of the tab:
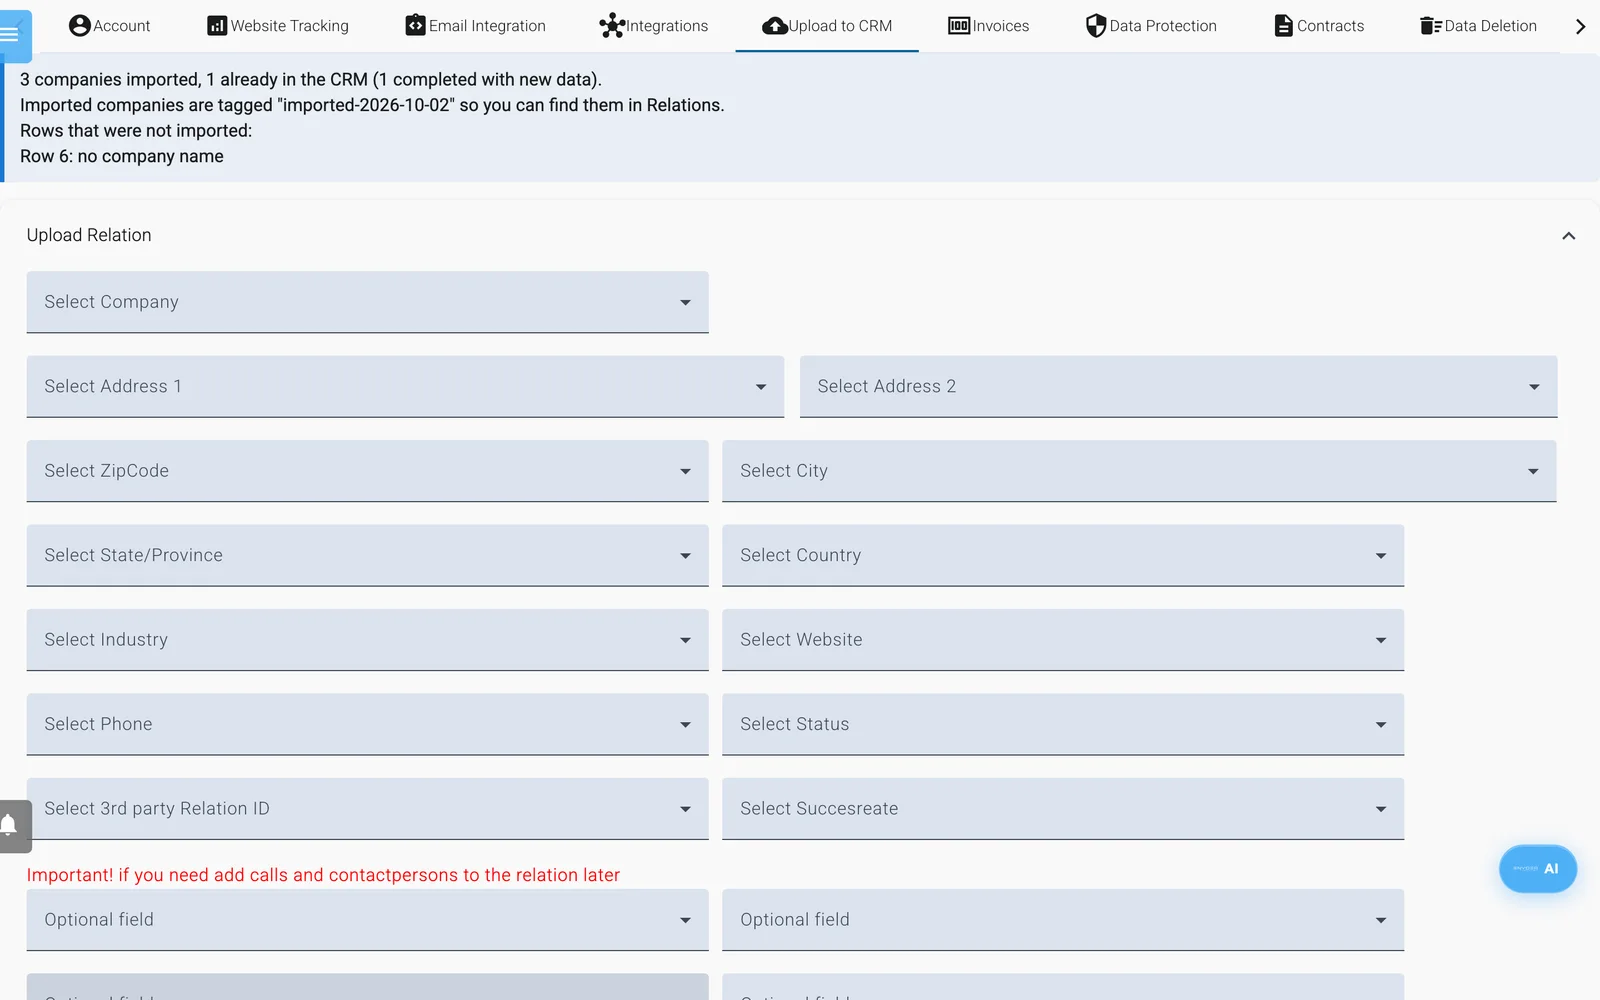
The summary lists how many companies were imported, how many were already in your CRM, and every skipped row with its reason.
- Skipped rows are listed with their spreadsheet row number, where row 1 is the header. For example "Row 6: no company name".
- Imported companies get the tag
imported-followed by the date, so you can find them in Relations. - Existing relations are never overwritten. A company that is already in your CRM (matched by relation ID, website or name) is only filled in where its fields were empty, so importing the same file twice creates nothing new.
Contact persons and calls have their own panels, Upload Contactperson and Upload Calls. They attach to a company through the 3rd party Relation ID column, so import the companies first and map that column. Each call also needs a date.
If you only want to email the people and do not need them in the CRM, upload the sheet as a mailing list instead. See Mailing lists and segments.
Or use an AI assistant. If you have connected Claude or ChatGPT, paste the rows into the chat with the columns email, firstname, lastname, company, website, title and country, and ask it to import them as relations and contact persons. Rows without a valid email address are skipped.
Check your work
- Open Relations and search for a name you imported.
- Open the relation. Check Name, Email and Source, and look in the Contact Person tab.
- For a bigger import, use the filter icon and filter by Tags to see only the new relations.
Next steps
- Learn how to find and edit relations in Relations (CRM).
- Email your new contacts with Mailing lists and segments.