Settings reference: every tab, card and field
What Settings is
Settings holds everything you configure once and then rarely touch. Click the gear icon at the bottom of the left menu to open it. It has ten tabs, in this order: Account, Website Tracking, Email Integration, Integrations, Upload to CRM, Invoices, Data Protection, Contracts, Data Deletion and System Logs.
Before you start
- Some cards are for company admins only. These are marked below. See Team and roles.
- Open a tab by clicking its name. If a shortcut, for example from the AI assistant, lands on a neighbouring tab, click the tab you want.
Account
The left side has a Quick Navigation list that jumps to a card. The cards are, from top to bottom:
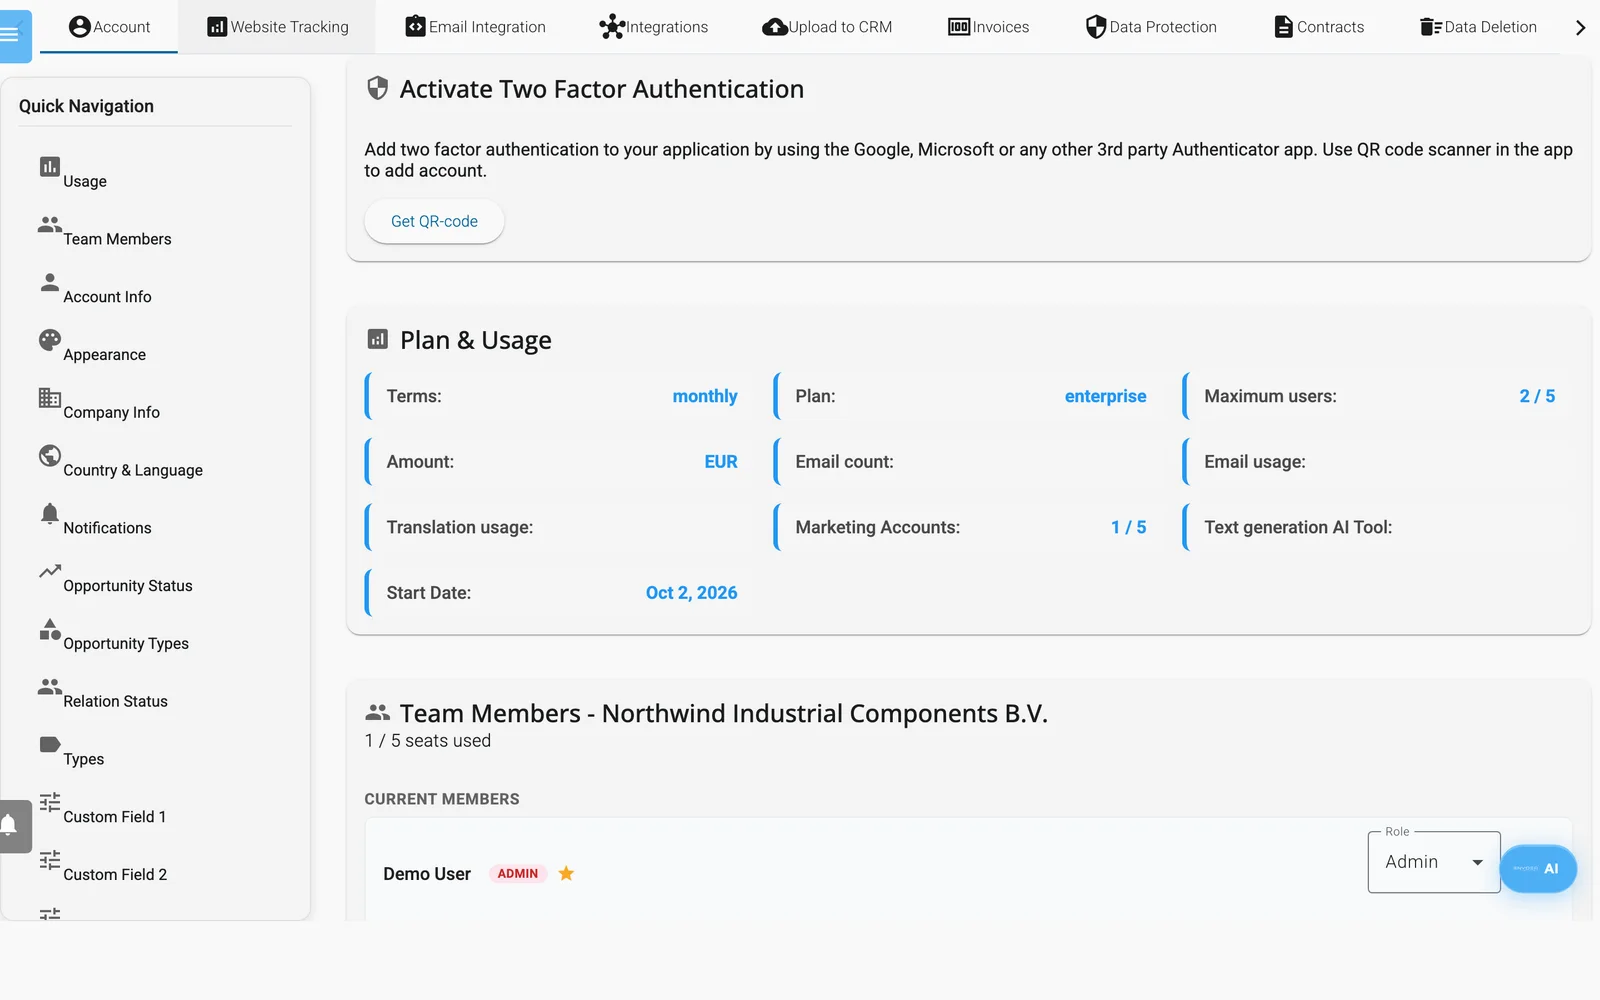
The Account tab: two-factor authentication, plan and usage, and your team.
- Two-factor authentication. Get QR-code, Verify, and Reset or deactivate two-factor authentication. See Sign in and manage your account.
- Plan & Usage (admins only). Shows Terms, Plan, Maximum users, Amount, Email count, Email usage, Translation usage, Marketing Accounts, Text generation AI Tool and Start Date. See Plans and billing.
- Team Members (admins only). Invite people, change roles, set the primary user and remove members. See Team and roles.
- Password Management. Request Password Reset sends a reset link to your e-mail address.
- Account Information. The read-only block Account settings shows Email, Username, Company name, Language, Role and Profile picture. The pencil icon switches to edit mode with Email, Username, Company Name and Save Changes. The Password field in edit mode does not change your password. Use Password Management for that.
- Delete My Account (in edit mode). A dialog asks you to confirm. Enydea then deletes your account at once, sends a confirmation to your e-mail address and signs you out. If you own the company, the company and its data are deleted as well, for the whole team. A team member who deletes their own account only loses their own sign-in. Invoices are kept because tax law requires it. See Privacy and compliance tools.
- Appearance (Set Standard Font and Colors). Font size, Select font, Primary Color, Secondary Color, Signature with Edit Signature, and the Company logo. The logo upload needs a standard relation, otherwise the text Set standard Relation to set company logo appears. UI Preferences has Reset Menu Positions, which puts floating toolbars back at their default places. Reload the page afterwards.
- Company information. Company name, address, city, Zipcode, State/Province, country, Phonenumber, and a block of billing details: Billing Address, Billing City, Billing zipcode, Billing State/Province, Billing Country, Billing Contact, Billing Email, SWIFT and IBAN/Bank account. Billing address is the same copies the company address. Click Save Changes. Invoices use these details. Print as Quote in an opportunity needs the company name, the billing address, Billing zipcode, Billing City, Billing Country, Billing Email, SWIFT, IBAN/Bank account and the company website. The website is set in step 1 of the Setup Wizard, because this card has no field for it.
- Business Profile. Company Description, Industry, Products, Services, Target Industries, Target Markets / Regions, Ideal Customer Profile, Target Company Size, Keywords and Competitors. Lists are comma-separated. The screen says this enables AI-powered lead source discovery. Click Save Business Profile. See Leadfinder.
- Country & Language Targeting. Shows your target countries and languages. Configure Countries & Languages changes them. The screen says they are used across Google Ads, social media, lead discovery and content creation.
- Notifications. Send me notifications asks your browser for permission, and Turn off notifications for this device reverses it. Notification Preferences has check boxes for Form, Chat, Mail, Video, Channel and Leadfinder notifications, Allow Push notifications and Allow Email notifications. Click Save Notification Settings.
CRM lists and custom fields
The last cards define the drop-down lists you see on relations and opportunities:
- Set Opportunity status and Set Opportunity types.
- Set Relations Status types and Set Types.
- Free Selection 1 to Free Selection 4, shown as Custom Field 1 to 4 in Quick Navigation. Each has a Name and a list of values. A field appears on relations only after you give it a Name.
- Add Custom Field adds more named lists (Custom Field 5, 6 and so on). Each has Add value, Reset values and a delete icon.
Click Add type to add an entry called new and rename it. Edits save as you make them. See Relations and CRM.
Website Tracking
Your Company ID with a copy button, the Website Tracking Code to paste before the closing </body> tag of every page, a WordPress Plugin download, a list of what the tracker collects, the tracking API endpoints, and a note that e-mail open and click tracking is automatic. Tracker behaviour sets consent, what is collected, and extras such as the chat widget, an e-mail capture banner, surveys and lead scoring. Tracking Integrations manages tags such as Google Analytics 4 and Meta Pixel. See Website tracking and consent and Tutorial: install the website tracker.
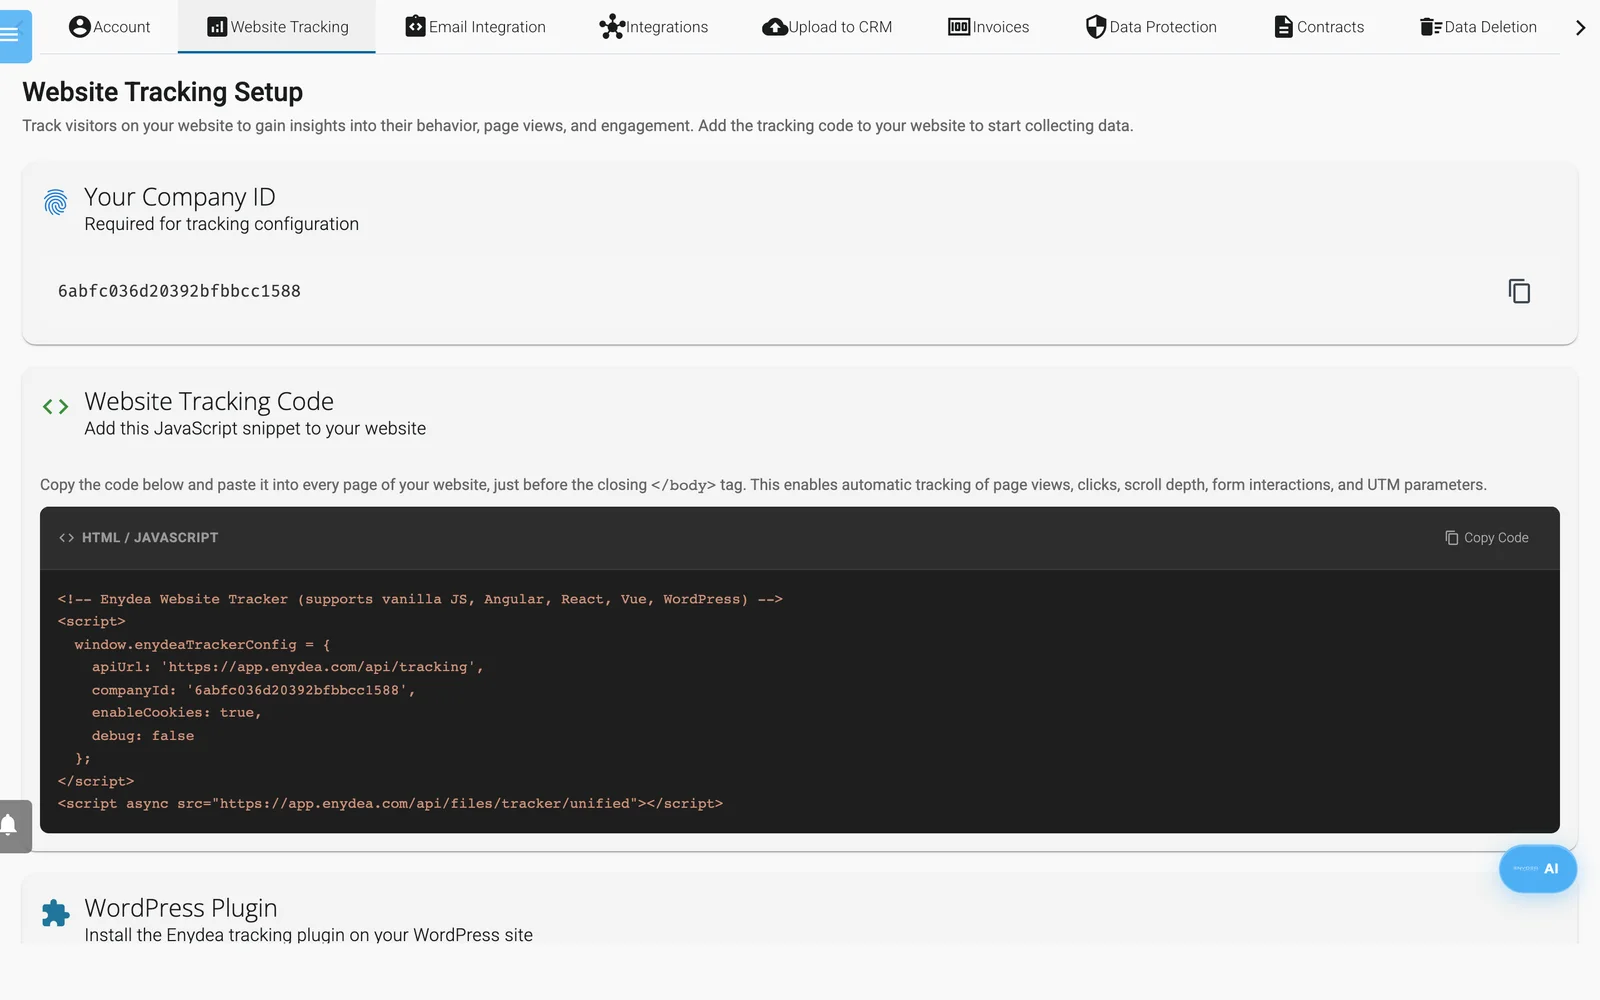
The Website Tracking tab with the code snippet for your website.
Email Integration
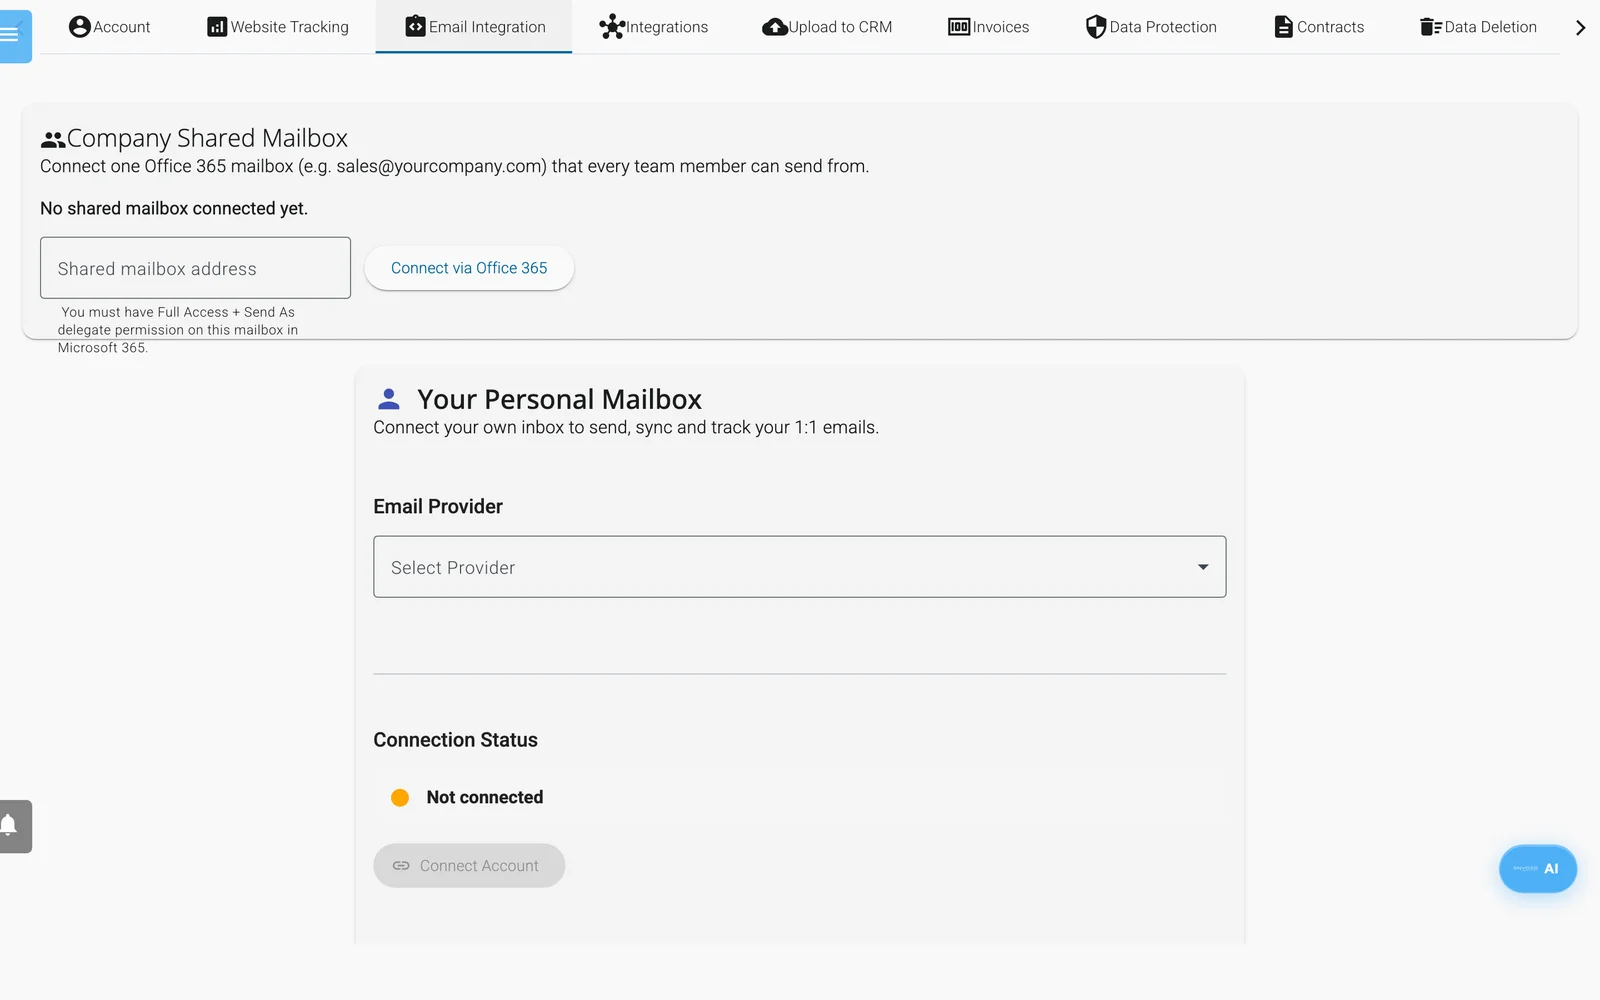
The Email Integration tab: the shared mailbox and your personal mailbox.
- Company Shared Mailbox. One Office 365 mailbox for the whole team. Admins connect and disconnect it.
- Your Personal Mailbox. Connect Microsoft Office 365, Google Gmail or IMAP / SMTP, and set sender details and how often to sync.
- Outlook Calendar. Connect Outlook calendar, needed for booking links.
- Email & Domain Setup. Register a sending domain, follow the DNS guide, and create e-mail addresses.
- Email Signatures. Manage your signatures.
See Mailbox, Tutorial: connect your mailbox and Tutorial: set up a bulk e-mail domain.
Integrations
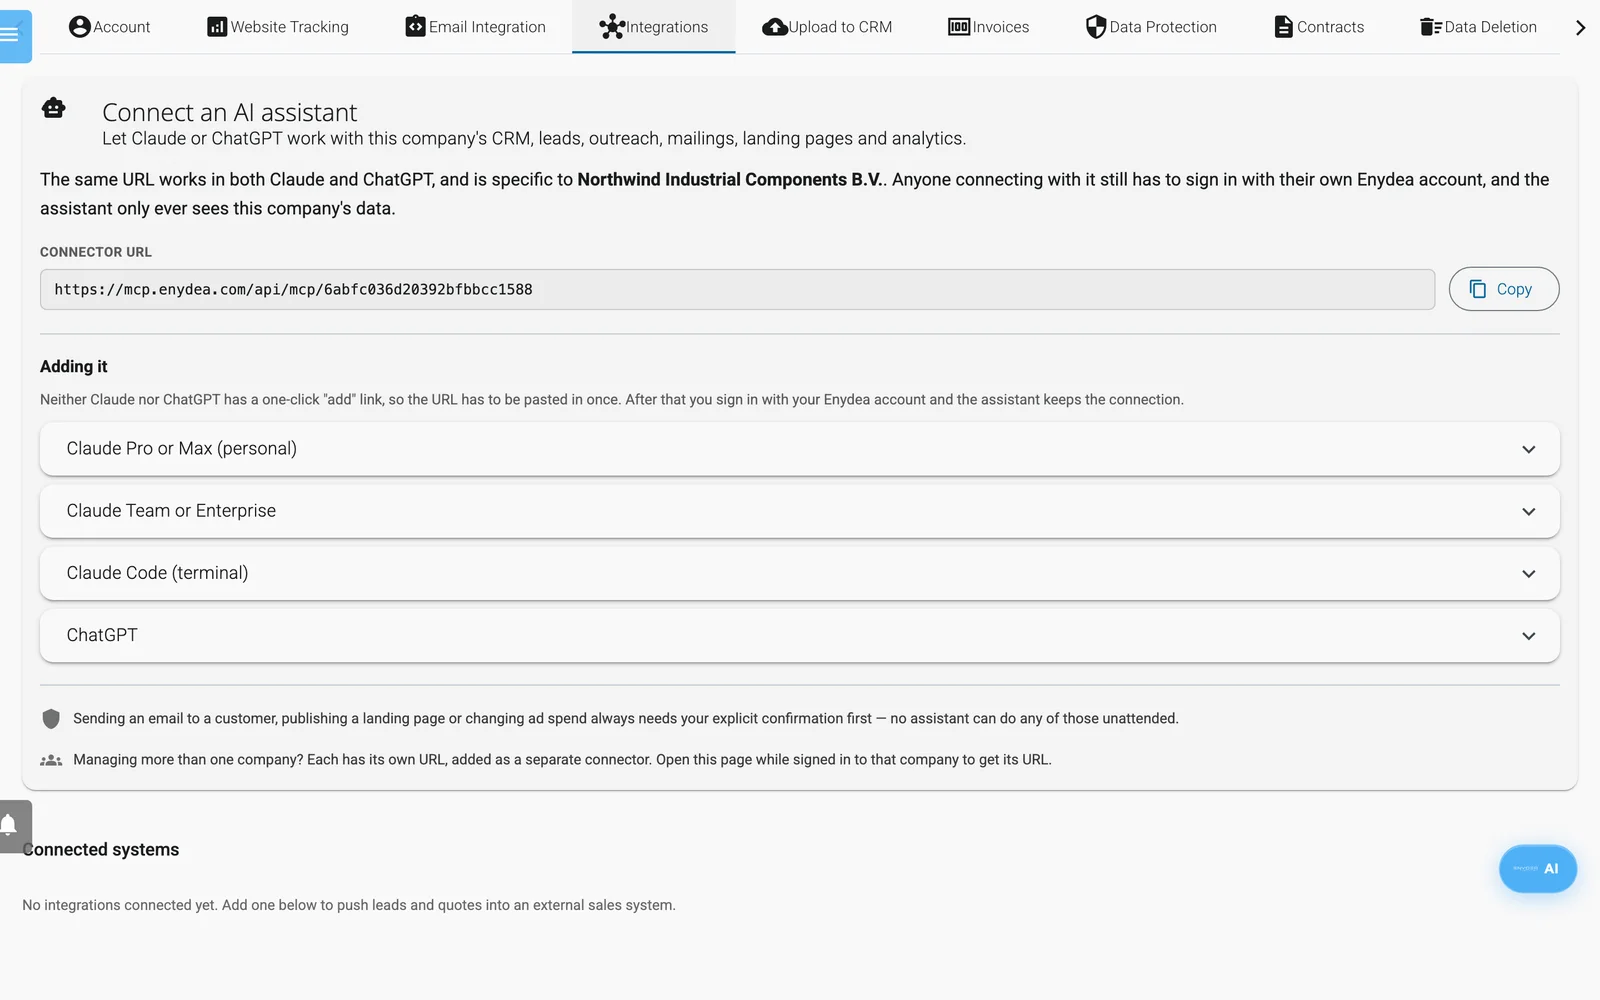
The Integrations tab, with the connector URL for AI assistants.
The tab has four cards, from top to bottom. The last three load when you scroll down to them.
- Connect an AI assistant. Shows your company connector address and the steps to add it to an AI assistant. See Connect AI assistants with MCP.
- Connected systems (admins only). Links Enydea to an external sales or quoting system. See Integrations overview.
- MCP servers (admins only). Gives the Enydea AI agent tools from another system's MCP server: Add MCP server, a policy per tool (Off, Allowed or Ask to confirm), Refresh tools, authentication and Recent calls. Every tool starts off. This is the opposite direction of Connect an AI assistant. See MCP servers.
- Brand kit. The brand your company markets under: Brand name, Tagline, Website, Booking link, Font, Video voice, colours, content guidelines, tone of voice, hashtags, and Logos and marketing files. The AI agent reads it before it writes marketing content. Everyone in the company can see it; only company admins can save it. See Brand kit.
Upload to CRM
Three panels: Upload Relation, Upload Calls and Upload Contactperson. Choose an Excel file (.xlsx), match its columns, and click Upload to Database. A summary at the top of the tab lists what was imported and which rows were skipped, and why. Existing relations are never overwritten. See Tutorial: import contacts.
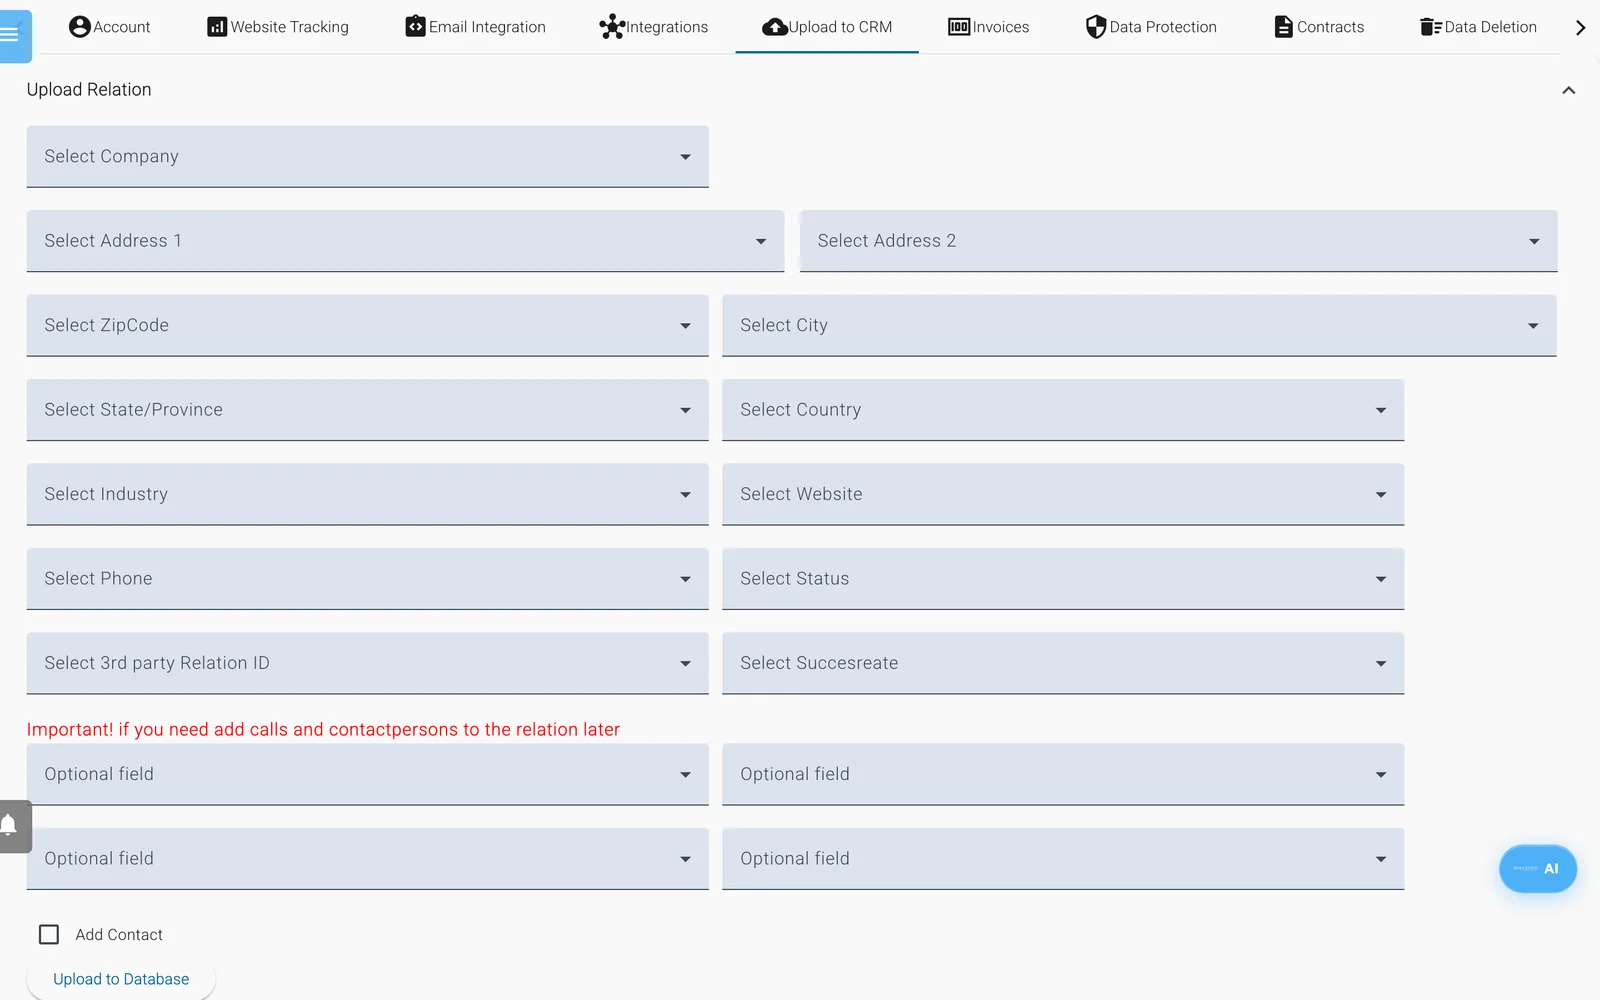
The Upload to CRM tab. Each drop-down picks the spreadsheet column that holds that field.
Invoices
Lists the invoice files of your subscription. Click Load Invoices if the list is empty, then the download icon to open a PDF. See Plans and billing.
Data Protection
Public Authority Data Requests is a log for requests from public authorities, with Log New Request and Audit Report. It is a compliance record for your company, not a personal privacy setting. See Privacy and compliance tools.
Contracts
Contract Templates holds the templates you use in Relations -> Contracts. See Contracts and e-signing.
Data Deletion
The GDPR Data Deletion Widget: a Data Deletion API Key, embed code for your website, and the table of Data Deletion Requests. See Privacy and compliance tools.
System Logs
Log Messages lists the messages of your account with date, description, item and code. These are the same messages as the notification bell. Delete All removes every message at once, without asking.