
Install the website tracker and check it works
Goal
You add the Enydea tracking code to your website, set up the consent banner, and confirm that your own visit is recorded. This takes about 15 minutes.
What you need
- Permission to edit your website's HTML, or a WordPress admin login.
- The address of your site's privacy policy page.
Steps
Add the code
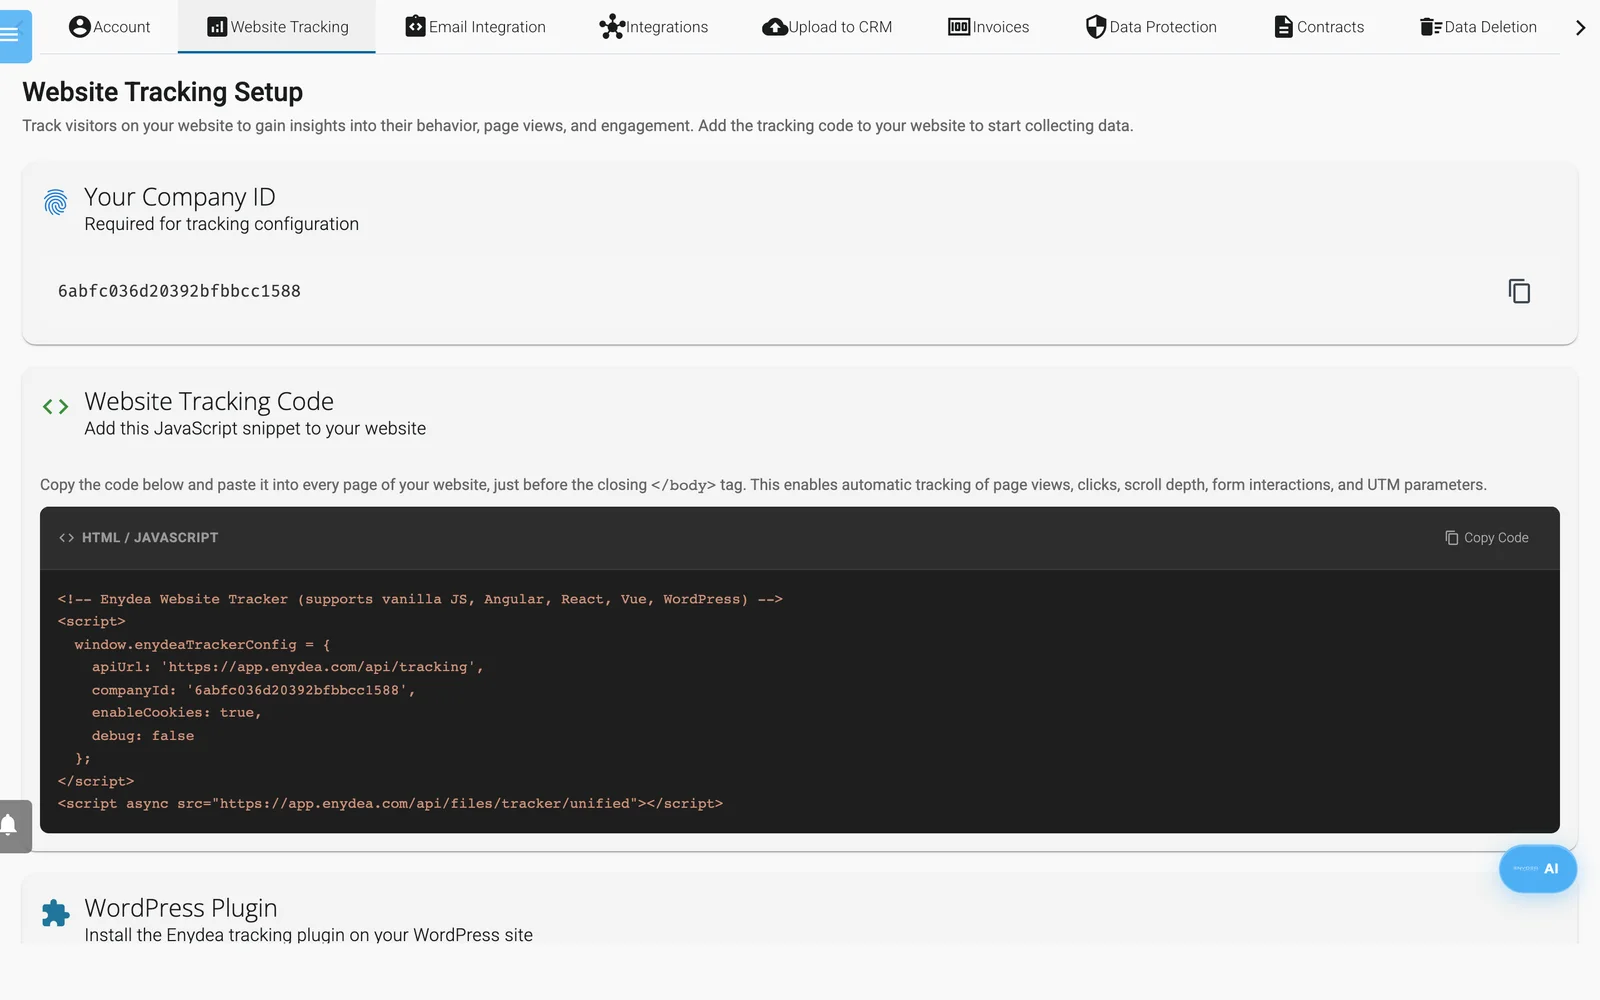
Where to copy the code from.
- Click the gear icon at the bottom of the sidebar, then open the Website Tracking tab.
- Under Website Tracking Code, click Copy Code. Your Company ID is already inside it.
- Paste the code into every page of your site, just before the closing
</body>tag. A shared footer or layout file does this in one place. - Save and publish your site.
If you use WordPress, skip steps 3 and 4:
- In Website Tracking, click Download WordPress Plugin.
- In WordPress, open Plugins -> Add New -> Upload Plugin, upload the ZIP file and click Activate.
- Open Settings -> Enydea, save, and read the connection message.
Set up consent
- Scroll to Tracker behaviour and find Consent.
- Leave Ask visitors for consent on, unless your site already has its own cookie banner.
- Edit Banner text.
- Replace the Privacy policy link with the address of your own privacy policy page. It starts as
/privacy. - Click Save. Visitors pick up the change within 5 minutes.
Add your analytics IDs (optional)
- Scroll to Tracking Integrations.
- Enter your ID in Google Analytics 4, Google Tag Manager or another box that matches the format shown. A warning appears when an ID is in the wrong format.
- Click Save Tracking Configuration.
Check your work
- Open
https://app.enydea.com/api/tracking-settings/followed by your Company ID in a browser tab. A block of settings text means the ID is right. An "Unknown company id" error means it is not. - Open your website in a private browser window. If you use WordPress, do not be logged in as an administrator, because administrators are not tracked.
- The consent banner should appear. Click Accept.
- Click through a few pages.
- In Enydea, open the Dashboard. Click Add Dashboard Components and choose Add unified tracking. The widget shows sessions and page views per day, and your visit should appear there.
If you are comfortable with your browser's developer tools, type window.enydeaTracker in the console. An object means the script has loaded.
Common mistakes
- Nothing is recorded until you click Accept. That is the default. Test with the banner, not around it.
- No banner at all. A browser that sends Global Privacy Control or Do Not Track gets no banner and is not tracked, by design. Switch the setting off in your browser to test.
- Old script address. A script address ending in
assets/js/enydea-tracker.jsdoes not work. Replace the whole snippet with the one from Website Tracking. - Code on one page only. Add it to every page.
- Wrong or missing Company ID. Compare it with Your Company ID.
- Testing as a WordPress administrator. The plugin skips administrators unless you untick Exclude administrators.
- Consent switched off. Enydea then records at once but does not load your integrations.
- Account number in the Google Tag Manager box. It needs an ID that starts with
GTM-. - Two banners. If another plugin shows its own cookie banner, visitors see both. The Enydea banner alone decides when Enydea starts recording.
- TikTok, Pinterest or HubSpot IDs. You can save them, but the tracker does not load them.
Next steps
- Choose what is collected and try the extras (Website tracking and consent).
- Describe your tracking in your privacy policy, and add the data deletion widget (Privacy and compliance tools).
- Open a relation's Journey tab to see its website visits (Relations and CRM).