
Prise de rendez-vous et liens de réservation
Ce que font les liens de réservation
Un lien de réservation permet à un client de choisir un créneau libre parmi les jours que vous autorisez. Lorsque le client confirme, le rendez-vous apparaît dans votre agenda Outlook et Outlook envoie au client une invitation d’agenda. Le client n’a pas besoin de se connecter.
Les liens de réservation fonctionnent uniquement avec les agendas Outlook et Microsoft 365. Google Agenda n’est pas pris en charge.
Avant de commencer
- Il vous faut un agenda Outlook. Connectez-le d’abord, comme décrit ci-dessous. Connecter votre boîte mail ne suffit pas, car l’accès à l’agenda est une autorisation distincte.
- Si votre organisation Microsoft 365 ne permet pas aux utilisateurs d’approuver des applications, un administrateur doit approuver l’accès à l’agenda avant que vous puissiez le connecter.
- Faites un test avec une deuxième adresse e-mail avant d’envoyer un lien à un client. Créez le lien, ouvrez-le dans une fenêtre de navigation privée, réservez un créneau, puis vérifiez que l’événement figure dans Outlook, que l’invitation arrive et que la réservation apparaît dans Prise de rendez-vous (Scheduling).
Connecter votre agenda Outlook
- Ouvrez Paramètres (Settings) -> Intégration e-mail (Email Integration).
- Trouvez la carte Calendrier Outlook et cliquez sur Connecter le calendrier Outlook.
- Connectez-vous chez Microsoft et accordez l’accès. Vous revenez dans Enydea et la carte affiche Connecté.
La même carte se trouve sur l’écran Prise de rendez-vous. Déconnecter arrête tous les liens de réservation jusqu’à ce que vous reconnectiez l’agenda.
Créer un lien de réservation
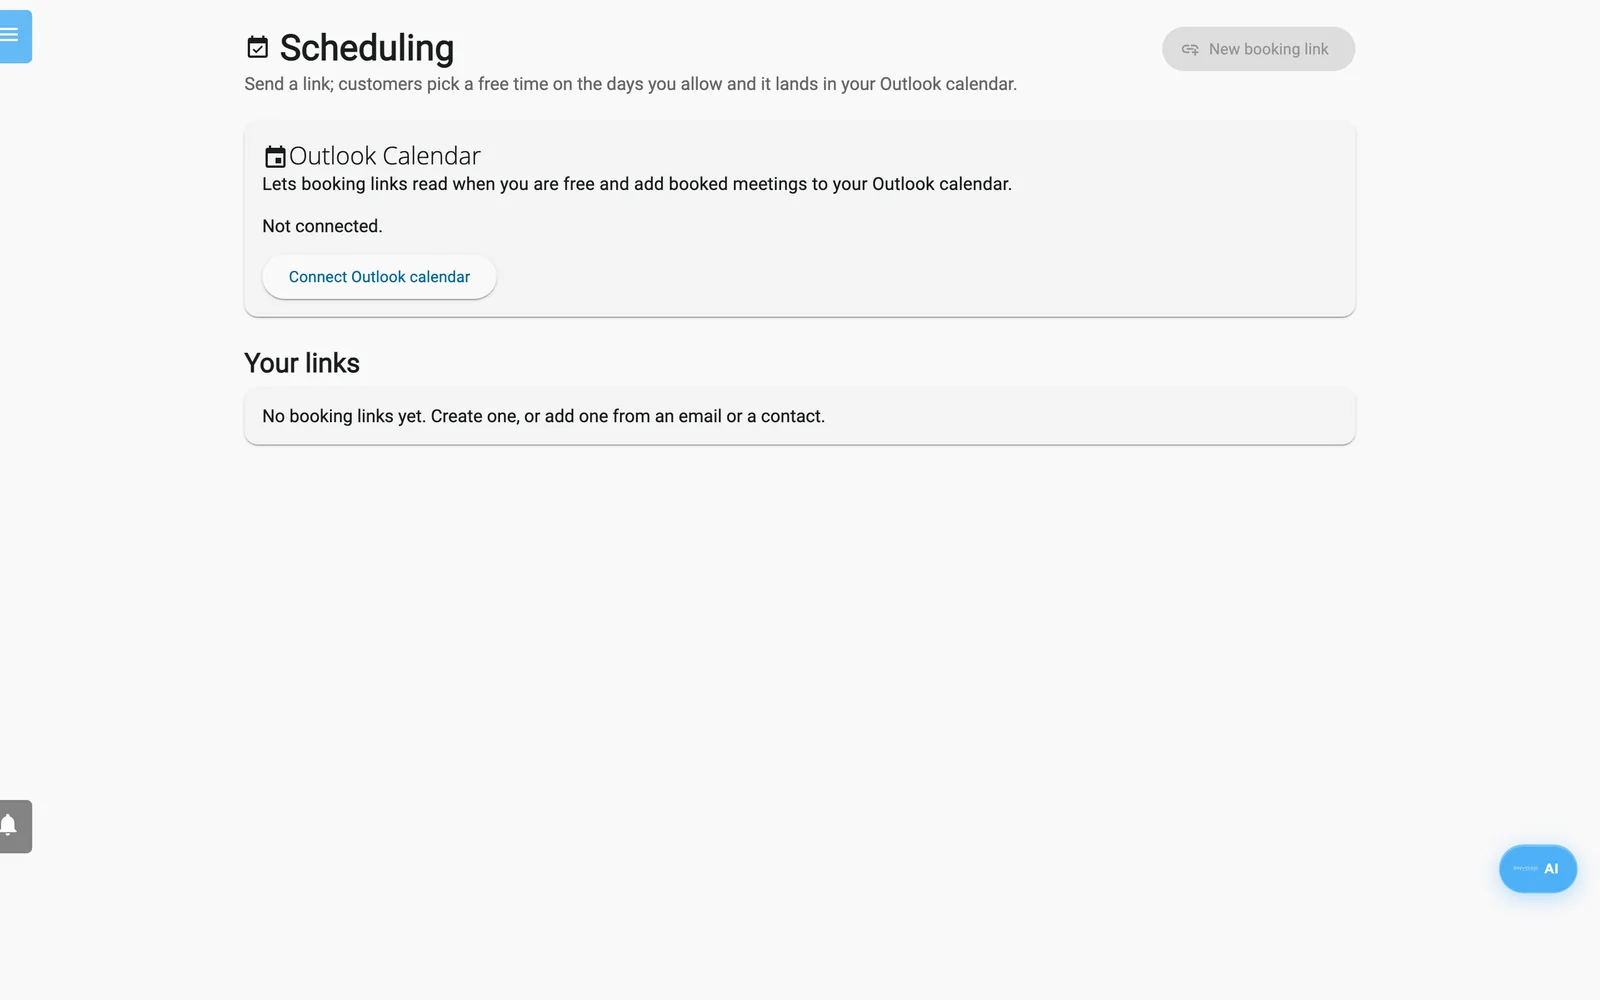
L’écran Prise de rendez-vous : la connexion de l’agenda en haut, vos liens de réservation en dessous.
- Ouvrez Prise de rendez-vous dans le menu latéral et cliquez sur Nouveau lien de réservation. Le bouton fonctionne une fois votre agenda connecté.
- Saisissez un Titre (affiché au client).
- Sous Quels jours les clients peuvent-ils réserver ?, choisissez une date de début et de fin dans Du – au. Les jours du lundi au vendredi sont sélectionnés ; cliquez sur les boutons des jours pour modifier ce choix. Cliquez sur la croix d’une pastille de jour pour retirer un seul jour. Un lien peut proposer au maximum 62 jours.
- Réglez De et Jusqu'à (09:00 à 17:00 par défaut) et la Durée de la réunion : 15, 20, 30, 45, 60, 90 ou 120 minutes.
- Ouvrez Plus d'options ou Page de réservation : lieu de rendez-vous, ordre du jour, photo et vidéo si vous en avez besoin (tableau ci-dessous).
- Cliquez sur Créer le lien. Enydea copie le lien et affiche Lien copié.
| Option | Ce qu’elle fait |
|---|---|
| Message affiché avec le lien et dans l'invitation | Texte pour la page de réservation et l’invitation. |
| Lieu (facultatif) | Lieu ajouté à l’invitation. |
| Ajouter une réunion en ligne Teams | Ajoute une réunion Teams. Le client reçoit un bouton Rejoindre la réunion en ligne. |
| Battement entre les réunions (min) | Minutes libres gardées autour de chaque réservation. |
| Délai de prévenance minimum (heures) | Délai minimal avant un créneau. Vaut 4 au départ. |
| Nombre max. de réservations | Ferme le lien après ce nombre de réservations. Vide signifie illimité. |
| Fuseau horaire des jours et heures ci-dessus | Prend au départ le fuseau horaire de votre navigateur. |
| Calendrier | N’apparaît que si votre entreprise a une boîte mail partagée. Choisissez Mon calendrier ou la boîte mail partagée. Vous avez besoin de l’accès complet (Full Access) à cette boîte aux lettres dans Microsoft 365. |
| Proposer « Sur votre stand » (demande le hall et le stand du client) | Permet au client d’indiquer un hall et un stand. |
| Autres lieux de rendez-vous, un par ligne | Le client en choisit un. |
| Sujets à l'ordre du jour que les clients peuvent cocher, un par ligne | Les sujets cochés sont ajoutés à l’invitation. |
| Votre photo (adresse https, facultatif) et Votre fonction, affichée sous votre nom (facultatif) | Affichés sur la page de réservation. |
| Vidéo d'arrière-plan du Video Creator | Est lue en arrière-plan de la page de réservation. |
Partager un lien
- Sur Prise de rendez-vous, cliquez sur Copier le lien sur la carte d’un lien.
- Depuis une relation, ouvrez le menu à trois points et choisissez Copier le lien de réservation.
- Depuis un interlocuteur qui a une adresse e-mail, cliquez sur l’icône Envoyer un lien de réservation, puis sur Rédiger un e-mail avec le lien. L’éditeur d’e-mail s’ouvre avec l’objet "Prendre rendez-vous" et le lien dans le texte.
- Dans l’éditeur d’e-mail de Boîte mail (Mailbox), cliquez sur Lien de réservation dans la barre d’outils, puis sur Insérer un lien.
Lorsque vous avez déjà des liens actifs, la boîte de dialogue ouverte depuis une relation, un interlocuteur ou l’éditeur d’e-mail propose aussi Utiliser un lien existant. Les liens créés depuis une relation ou un contact sont mémorisés pour cette relation ou ce contact.
Ce que voit le client
- La page de réservation affiche votre titre, la durée et, le cas échéant, le message, le lieu, la photo de l’hôte et la vidéo.
- Le client clique sur un jour mis en évidence sous Choisissez un jour, puis sur un horaire sous Choisissez un horaire. Les horaires s’affichent dans le fuseau horaire du client.
- Le client saisit Votre nom et Adresse e-mail. Entreprise (facultatif), Téléphone (facultatif), Où nous retrouvons-nous ?, De quoi souhaitez-vous discuter ? et Quelque chose que nous devrions savoir ? (facultatif) apparaissent quand c’est pertinent.
- Le client clique sur Confirmer la réservation et voit Votre rendez-vous est confirmé, avec une note indiquant qu’une invitation d’agenda est en route.
Si quelqu’un d’autre prend le créneau avant lui, le client est invité à en choisir un autre.
Après une réservation
- L’événement apparaît dans votre agenda Outlook. L’invitation ne contient que le texte que vous avez rédigé. Ce que le client a saisi dans les champs de notes et d’entreprise reste dans Enydea.
- Sur Prise de rendez-vous, cliquez sur la flèche de la carte d’un lien pour ouvrir Réservations. Vous voyez l’heure, le nom, l’e-mail, l’entreprise, le téléphone et les notes.
- Si le lien a été créé pour une relation ou un contact, ou si l’e-mail correspond à un interlocuteur, une entrée Réunion nommée "Meeting booked" suivie de votre titre apparaît dans l’onglet Appels/messages (Calls/Messages) de la relation. Une réservation faite par une personne inconnue figure uniquement dans la liste Réservations.
Gérer vos liens
Chaque carte de Vos liens affiche un statut : Actif, Désactivé, Complet ou Expiré. Utilisez l’interrupteur Réservations ouvertes pour mettre un lien en pause, l’icône d’aperçu pour ouvrir la page client, et la corbeille pour le supprimer. La suppression arrête le lien. Les réservations déjà faites restent dans votre agenda.
Limites
- La page de réservation ne propose ni annulation ni report. Un client peut seulement refuser l’invitation dans Outlook. Cela ne libère pas le créneau et ne modifie pas la réservation dans Enydea. Si vous supprimez l’événement dans Outlook, la réservation apparaît toujours comme réservée.
- Un lien réserve dans l’agenda d’une seule personne. Il ne vérifie pas les autres participants.