
Envoyer votre première campagne e-mail
Objectif
Envoyez une première campagne à une petite liste de test, puis vérifiez ce qui s’est passé. Prévoyez environ 45 minutes, sans compter le temps nécessaire à la propagation de vos modifications DNS.
Ce qu’il vous faut
- Un domaine d’envoi vérifié. Si vous n’en avez pas, suivez d’abord Configurer un domaine d’envoi d’e-mails en masse.
- Une relation sélectionnée sous Compte actuel (Current Account) dans la barre latérale. Un nouveau compte en contient une dès le départ, au nom de votre entreprise.
- Deux ou trois adresses que vous pouvez consulter, comme la vôtre et celle d’un collègue. N’utilisez pas de vrais clients pour un premier test.
Étapes
- Ouvrez Paramètres (Settings) -> Intégration e-mail (Email Integration) -> Configuration e-mail et domaine. Vérifiez que votre domaine affiche Vérifié.
- Ouvrez Mailings et l’onglet Liste de diffusion (Mailing list). Cliquez sur +, remplacez le contenu de Nom de la liste par « First campaign test » et cliquez sur Enregistrer la liste de diffusion.
- Ouvrez Nouvel import. Saisissez un E-mail et un Prénom, puis cliquez sur Ajouter un destinataire. Répétez l’opération pour chaque adresse de test. Pour les fichiers et les imports depuis le CRM, voir Listes de diffusion et segments.
- Ouvrez l’onglet Éditeur de modèles (Template Editor) et cliquez sur Modèle vierge. Renseignez Ligne d'objet et Texte d'aperçu. Un modèle vierge commence par une section. Faites-y glisser un bloc Texte, un bloc Bouton et un bloc Pied de page depuis Outils. Dans le texte, écrivez
Hello %recipient_firstname%,suivi de votre message. - Cliquez sur Aperçu de l'e-mail, puis sur Enregistrer et nommez le modèle.
- Ouvrez l’onglet Campagnes (Campaigns) et cliquez sur Configuration de campagne par IA. Décrivez la campagne en une ou deux phrases et cliquez sur Générer le plan, puis sur Créer la campagne. L’onglet Campagnes n’offre pas d’autre moyen de lancer une campagne.
- Sélectionnez la nouvelle campagne dans la liste. Dans Liste de diffusion, retirez la liste générée en cliquant sur son x, puis ajoutez « First campaign test ». La liste générée est constituée à partir de votre CRM : vérifiez donc ce point avant de planifier quoi que ce soit.
- Si le plan a créé des mailings de relance, supprimez-les pour ce premier test. Ouvrez le menu à points de chaque relance et cliquez sur Supprimer.
- Sur le premier mailing, ouvrez le menu à points et cliquez sur Modifier. Cliquez sur Afficher les modèles, choisissez votre modèle, puis cliquez sur Masquer les modèles. Renseignez Nom de l'expéditeur, réglez Expéditeur sur une adresse de votre domaine vérifié et vérifiez Objet. Choisissez une Date d'envoi et une Heure d'envoi dans quelques minutes, ainsi que le bon Fuseau horaire. Cliquez sur Enregistrer.
- Ouvrez à nouveau le menu à points et cliquez sur Planifier pour planifier le mailing. Vous voyez « Envoi programmé ». Si un message comme Champ Expéditeur manquant apparaît, corrigez ce champ et réessayez.
Enydea recherche chaque minute les mailings arrivés à échéance. Votre campagne part à l’heure que vous avez fixée.
Vérifier le résultat
- Vos adresses de test reçoivent l’e-mail. Regardez aussi dans les dossiers de spam. Vérifiez la formule d’appel, le lien du bouton et le pied de page.
- Une notification indique « Campaign mailing ... sent to N recipients ». N doit correspondre au nombre d’adresses de votre liste. Dans la campagne, réglez Afficher les e-mails sur E-mails envoyés : votre mailing y figure, et Modifier et Supprimer sont grisés.
- Ajoutez au Tableau de bord le widget Ajouter les données de mailing pour voir le nombre d’e-mails distribués, ouverts et cliqués.
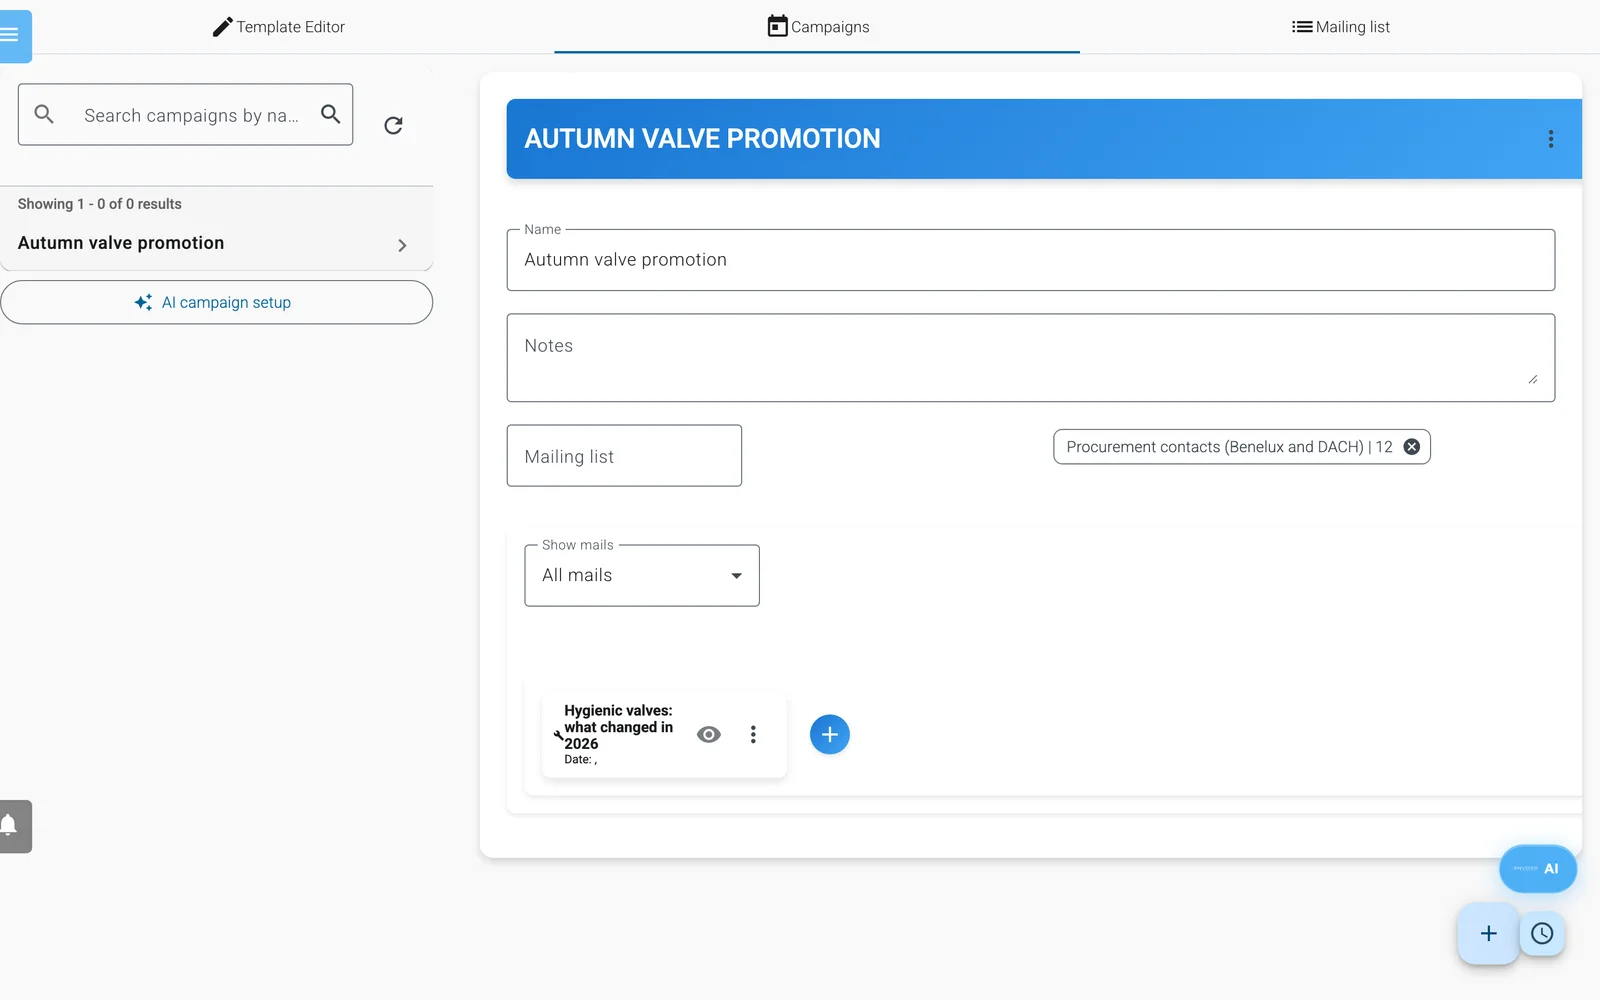
Une campagne terminée : nom, liste de diffusion et e-mail à envoyer.
Attention : Ne cliquez pas sur le lien de désabonnement d’un e-mail de test sans le vouloir vraiment. Il marque cette adresse comme désabonnée sur toutes les listes de votre entreprise.
Astuce : Si rien n’arrive et que N vaut 0 (ou qu’aucune notification n’apparaît), le domaine indiqué dans Expéditeur n’était probablement pas vérifié au moment de l’envoi du mailing. Un mailing envoyé ne peut pas être modifié. Corrigez le domaine, cliquez sur le grand + pour ajouter un nouveau mailing à la campagne, puis planifiez celui-ci.
Pour aller plus loin
- Constituez une audience plus large à partir de votre CRM : Listes de diffusion et segments.
- Découvrez toutes les options de campagne, y compris les relances : Mailings et campagnes.
- Trouvez de nouvelles entreprises à contacter : De l’étude de marché aux leads dans votre CRM.